
Choosing the best spray paint for 3D printed parts in 2026 is not as simple as picking a color. The right result depends on the filament, surface preparation, and the finish you want. A glossy coat can make a carefully sanded PLA part look polished; the same paint may highlight ridges on a rough print. Small details matter.
Joel Telling, the 3D-printing educator known as The 3D Printing Nerd, offers a useful principle, paraphrased here: treat preparation as part of the print, not an afterthought. That advice guides this look at Spray Painting 3d Printed Parts, from choosing compatible primers and paints to building thin, even coats. Test on a spare print first. It saves headaches.
A rattle can is convenient, but it is not magic. Wash off dust, let the part dry, and check that the primer suits the plastic. PLA, PETG, and ABS can respond differently, so follow product instructions and try a small, hidden area. Work with good ventilation, too.
There is no single best spray paint for every project. A tabletop miniature needs different coverage from a large cosplay prop or a functional bracket. Even careful prep can leave visible layer lines. That is worth admitting. This guide compares practical options by adhesion, finish, ease of use, and value, so you can choose with realistic expectations—not just a shiny product label.
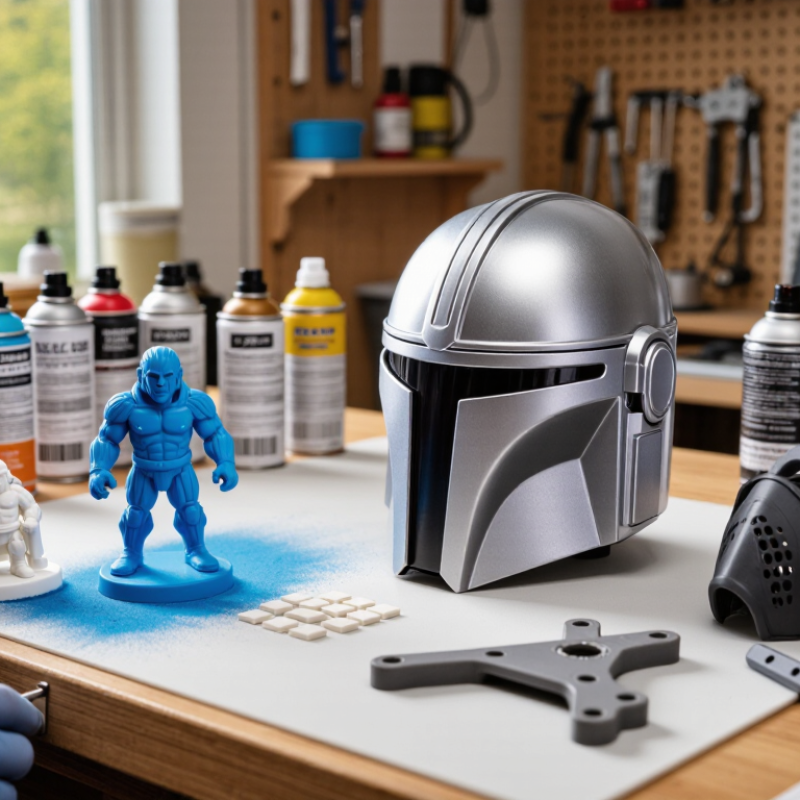
Spray paint can give a 3D-printed part an even color, but the result depends heavily on the surface beneath it. Layer lines often remain visible through a glossy finish, especially on curved walls. Sanding with fine-grit paper can soften them, though aggressive sanding may flatten small details. Dust left in grooves can also spoil the finish.
Different plastics respond differently. PLA usually accepts paint after cleaning and light sanding, while some flexible materials may need a coating designed to bend without cracking. Test on a small offcut when possible. That matters. A compatible primer can improve adhesion, but a thick layer may blur lettering or close narrow holes. Allow each coat to dry according to its directions, and use several light passes rather than one heavy spray. Thin coats work.
I have found that print orientation affects the final look: ridges facing the light can show through even careful painting. A matte finish tends to hide minor surface flaws better than a glossy one, though it will not conceal deep gaps. Keep the can moving and spray in a ventilated area. One drawback is easy to miss: paint can make fitted parts slightly larger, so mask joints and threaded openings before spraying. Test the fit after the coating has fully cured.
Choosing spray paint for a 3D-printed part starts with the plastic, not the color. PLA, PETG, and ABS can react differently to solvents, heat, and sanding, so test the full coating system on a hidden area or spare print. Watch for softening, tackiness, or fine cracks. Small details matter: a glossy surface may need light abrasion, while deep layer lines can remain visible beneath paint. There is no universal winner.
Application conditions count, too. Check the paint’s stated compatibility, drying window, and recommended temperature range; cool or humid air can slow curing and trap a soft layer under a dry surface. Apply several thin, even coats rather than flooding corners. For critical parts, assess adhesion after curing using a recognized method such as ASTM D3359, not just a fingernail scratch.
The Wohlers Report 2024 estimated that the global additive-manufacturing industry reached $20.035 billion in 2023, up 11.1% year over year. That growth spans many materials and uses, so it does not identify one best paint. It does make material-specific testing more important.
Honestly, surface preparation is easy to rush. That is often where the finish fails.
Choosing the best spray paint starts with the surface, not the can. Wohlers Report 2024 estimated that the global additive manufacturing industry reached about $20.0 billion in 2023, growing 11.1% year over year. That growth spans different processes and plastics, so one preparation routine will not suit every print. FDM parts often need seams trimmed and layer lines lightly sanded. Start around 220 grit, then refine the surface without flattening small details. Remove dust with a clean, lint-free cloth. A greasy fingerprint can spoil an otherwise smooth finish.
PLA usually tolerates gentle sanding and cleaning with mild soap and water; let it dry fully. PETG can be slick, so scuff it evenly and avoid pressing hard enough to smear the plastic. ABS also benefits from careful sanding, but skip aggressive solvent experiments. Nylon is more moisture-sensitive and often difficult to coat; dry it as its material guidance recommends, then test a plastic-compatible primer. For resin prints, remove washing residue and complete the specified post-cure before sanding. Small test first. I still find it easy to rush this step. Apply a thin primer layer to a hidden area and check adhesion after it dries. If paint lifts with light tape pressure, revisit cleaning or surface preparation before coating the whole part.
Durability starts before the paint can is opened. Remove support marks, then sand layer ridges with fine abrasive paper, taking care not to flatten small details. Wash off dust and let the part dry fully. Plastic type matters: PLA, ABS, and nylon do not accept every coating equally. Test the primer and paint on a hidden area or a spare print. A compatible plastic primer can improve adhesion, but follow its technical data sheet for recoat and curing times. Do not rush this step.
Apply several light coats from roughly 20–30 centimetres away, moving the can steadily past each edge. Heavy coats can pool in corners, soften fine features, or trap solvent beneath a dry surface. Let each coat flash off as directed, then allow the final layer to cure before handling. Patience helps. A little texture may remain; chasing a perfectly smooth surface can erase printed details. For a practical adhesion check, ASTM D3359-23 rates tape-test results from 0B to 5B, while ISO 2409:2020 uses classifications from 0 to 5, with 0 indicating the least coating detachment. These standardized tests can guide comparisons, but a small workshop test is not a certified result.
| Paint or Coating Type | Suitable Uses | Surface Preparation | Application Guidance | Typical Drying and Cure Time | Durability and Considerations |
|---|---|---|---|---|---|
| General-purpose acrylic spray paint | A practical choice for many decorative PLA, PETG, ABS, and resin prints when the paint is labeled for plastic. | Remove support marks, sand layer lines, clean off dust and oils, and apply a compatible plastic primer if needed. | Apply several light, even passes from the distance specified on the can. Allow the recommended interval between coats. | Often touch-dry in about 20–60 minutes; allow roughly 24–72 hours or the label’s stated period for fuller curing. | Easy to use and widely available. Adhesion and scratch resistance improve with suitable primer and adequate curing. |
| Enamel spray paint | Parts that need a harder decorative surface, including models and display pieces. | Use a clean, dry, lightly abraded surface. Test the paint and primer on a hidden area, especially on thin or solvent-sensitive prints. | Build coverage with thin coats rather than one heavy coat; follow the product’s recoat instructions. | May become touch-dry in a few hours, but can take several days to cure fully, depending on the formulation and conditions. | Can provide a durable finish after full curing. Longer cure times and possible solvent effects make a test patch important. |
| Lacquer spray paint | Fast-drying finishes for compatible prints and well-primed surfaces. | Use a compatible primer and test first. Some lacquer solvents can soften, craze, or otherwise damage certain plastics and coatings. | Apply very light mist coats initially, then add additional coats only as directed by the label. | Frequently dries to the touch within minutes, while complete hardening can take longer; use the stated cure time. | Can form a smooth, hard finish, but its strong solvents make material compatibility a key concern. |
| Plastic adhesion primer | A preparatory layer when the chosen topcoat needs improved grip on a smooth or difficult plastic surface. | Wash or wipe the part using a method safe for its material, let it dry completely, and lightly scuff glossy areas if appropriate. | Apply a thin, uniform coat. Observe the label’s flash-off and topcoat windows before painting. | Varies by formulation; many products allow topcoating within a specified window, while some require longer drying. | Improves the chance of reliable adhesion but does not replace cleaning, sanding, or a compatibility test. |
| Filler primer | Layer lines, small surface irregularities, and sanding marks on prints intended for a smoother appearance. | Remove loose debris first. Apply only where needed, then wet- or dry-sand according to the primer’s instructions. | Use multiple thin coats; sand between coats if the surface still shows print texture. | Drying time depends on coat thickness, temperature, humidity, and formulation; follow the label before sanding or topcoating. | Can improve surface appearance, but thick coats may obscure fine details and add weight. |
| Clear protective spray | Optional final coating for painted parts that need an additional protective layer or a chosen sheen. | Let the color coat dry or cure as directed. Confirm that the clear coat is compatible with the underlying paint. | Apply thin coats and test the full paint system on a spare print or hidden area before coating the finished part. | Follow the label; the clear coat may feel dry before it has reached full hardness. | May help protect against handling and abrasion, but cannot make a poorly bonded paint layer durable. |
Practical takeaway: There is no single best spray paint for every 3D-printed material. For a durable finish, prepare the surface, choose a paint system labeled for the plastic, apply thin coats, and allow full curing. Test compatibility first, particularly on PETG, ABS, and resin prints.
The best spray paint depends on both the printed material and the part’s job. PLA can soften under heat, so use light passes and avoid holding the can close. Check the paint’s compatibility on a leftover print first. PETG has a slick surface; gentle scuffing and a plastic-compatible primer can help paint adhere. ABS often accepts coatings more readily, but a test patch is still wise. Resin parts should be fully washed, cured, and dry before priming.
For display pieces, a matte finish can hide small layer lines, while gloss makes surface flaws more visible. Keep coats light. For parts used outdoors, choose a coating labeled for exterior use and follow its curing instructions. Flexible or frequently handled pieces may need a coating designed to resist cracking and abrasion. A metallic finish usually looks better over a smooth, even primer than over rough print texture.
Temperature and humidity affect drying, so follow the can’s label rather than relying on a fixed wait time. Spray in a ventilated area, and protect nearby surfaces from drifting mist. One easy mistake is rushing the second coat; paint may feel dry but remain soft underneath. Even careful prep cannot hide every print defect, and I would not expect spray paint to strengthen a weak part.
By continuing to use the site, you agree to the use of cookies. more information
The cookie settings on this website are set to "allow cookies" to give you the best browsing experience possible. If you continue to use this website without changing your cookie settings or you click "Accept" below then you are consenting to this.