
Blog

How to Choose the Right HDD Drill for Your Project?

Choosing the right Drill Hdd starts with the ground beneath your worksite, not the machine’s headline capacity. Horizontal directional drilling can install utilities with limited surface disruption, but the wrong rig can struggle with low pullback force, inadequate torque, or restricted access. Small differences matter. A narrow residential crossing and a long river approach demand very different equipment.

The U.S. Environmental Protection Agency’s 2023 Drinking Water Infrastructure Needs Survey and Assessment estimates $625 billion in drinking water infrastructure needs over 20 years. That figure is not an HDD forecast, but it reflects the scale of underground utility work and the importance of sound installation planning. For each project, compare bore length and diameter, soil or rock conditions, required thrust and pullback, available workspace, and drilling-fluid handling. Check manufacturer specifications against site data, and consult an experienced HDD contractor when ground conditions are uncertain. A bigger rig is not automatically the better choice. It may add transport and setup demands without solving the project’s main constraint. That part is easy to overlook. This guide explains how to match rig capacity, tooling, and support equipment to real site requirements, while recognizing that field conditions can still change the plan.
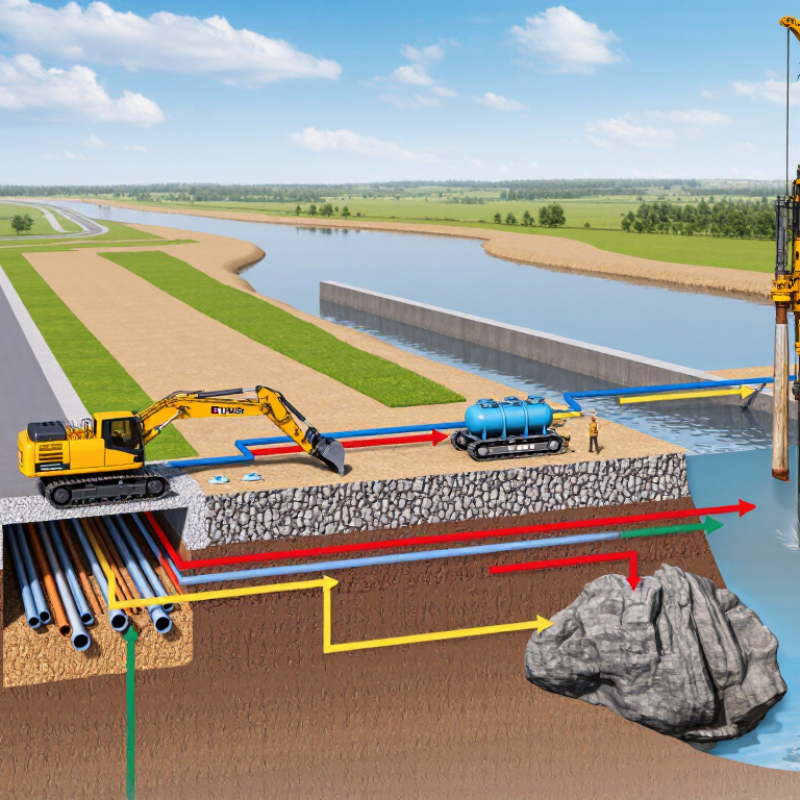
How to Choose the Right HDD Drill for Your Project?

Define Your Project’s Scope and Installation Requirements

Before selecting an HDD drill, define the complete bore: length, finished pipe diameter, entry and exit points, and allowable depth. A short service crossing beneath a driveway has different needs from a long utility installation beneath a road. Mark nearby utilities and confirm their depth; a map alone may be incomplete. The Common Ground Alliance’s 2019 study estimated that damage to underground infrastructure costs the U.S. economy about $30 billion annually. That figure makes careful route planning more than paperwork.

Ground conditions shape the equipment choice. Review geotechnical records, then check for surprises such as loose fill, cobbles, or groundwater. Specify the bore’s curve, required pullback force, and available work area, too. A compact rig may suit a tight site, but limited room can complicate rod handling and fluid management. Details matter.

Write down what the site can actually support: access for the rig and support equipment, spoil storage, water supply, and safe separation from traffic. Ask the project engineer to verify utility clearances and soil assumptions before finalizing capacity. The Federal Highway Administration’s guidance on horizontal directional drilling emphasizes subsurface investigation and bore-path planning. Still, reports can miss local variation. A plan may need adjustment once drilling starts.

How to Choose the Right HDD Drill for Your Project?

Define Your Project’s Scope and Installation Requirements

Start by confirming the product pipe size and installation length. The chart converts common nominal inch sizes to millimeters using 1 inch = 25.4 mm. These are nominal conversions, not actual outside diameters; verify the pipe standard and material before sizing the drill. Ground conditions, bore length, depth, and required pullback force also affect equipment selection.

Assess Soil Conditions, Terrain, and Site Constraints

Soil can change sharply within a short bore. Check the NRCS Web Soil Survey for mapped texture, drainage, and restrictive layers, then compare it with geotechnical boring logs near the planned alignment. The FHWA’s Horizontal Directional Drilling Good Practices Guidelines emphasizes site investigation before selecting equipment and designing the bore. Look for gravel, cobbles, fill, and groundwater depth; each can affect steering, fluid returns, and pullback. Maps are useful, but they may miss a buried fill pocket.

Match the drill’s torque and thrust to the ground, not just the pipe diameter. Fine, cohesive soils may hold a bore path, while loose sand can slough or allow drilling fluid to escape. Record actual grain-size data and water levels from site logs. Small details matter. A few cobbles near the entry pit can slow progress more than a long stretch of predictable soil.

Terrain and access deserve equal attention. Survey slope, overhead clearance, buried utilities, and the space available for the rig, drill rods, and fluid-management equipment. FHWA guidance treats bore geometry and safe work areas as part of planning, not afterthoughts. Check entry and exit angles against the surface grade and available cover. Then compare the proposed path with field measurements. It is tempting to trust a clean drawing; that may be the part worth questioning.

Match Drill Capacity to Bore Length and Diameter

A bore’s length and diameter should guide HDD drill selection, not the machine’s headline capacity alone. A 90-meter crossing with a modest product pipe may need a different setup from a short bore with a wide casing. Check the drill’s thrust, pullback force, and torque against the planned bore profile and ground conditions. These figures work together. Strong pullback cannot compensate for a reamer that is too large for the available torque.

Use the bore diameter to plan each reaming step, then confirm that the drill can handle the tooling and anticipated loads. For example, a 150-millimeter pilot bore that will be opened to 450 millimeters requires a staged plan, suitable rods, and enough fluid flow to carry cuttings out. Clay, gravel, and cobbles can change the load considerably. Small details matter. Review the manufacturer’s capacity charts, but treat them as planning limits, not guarantees; actual performance depends on the site. I have seen tidy calculations miss a difficult soil transition. That is worth admitting. Allow practical margin, and reassess the plan if a longer bore, larger product pipe, or unexpected ground conditions emerge.

Compare Guidance Systems, Tooling, and Support Needs

For a short bore in open ground, a walkover guidance system can keep costs and setup simple. The locator tracks the sonde as the drill advances, but buildings, traffic, and signal interference can disrupt readings. Longer or deeper crossings may call for wireline guidance, which sends steering data back through the drill string. Inertial systems can help where surface tracking is difficult, though they need careful calibration. No system is magic. The Common Ground Alliance’s 2023 DIRT Report estimated about 196,000 underground utility damages in 2022, a reminder that locating and planning deserve serious attention.

Match tooling to the ground, not just the machine’s rated pullback. Soft soils may need a different pilot head and reamer than cobbles or mixed ground; fluid choice also affects cuttings removal and bore stability. Ask whether rods, swivels, and reamers suit the planned diameter and soil conditions. A common planning miss is overlooking support: confirm access to trained locator operators, replacement wear parts, maintenance, and clear bore logs. Small details matter. Compare what the supplier can support on your site, including troubleshooting when readings drift or the ground changes. A modest rig with dependable guidance and timely technical help can be a better fit than excess capacity.

Evaluate Safety Features, Reliability, and Total Cost of Ownership

Choosing the right HDD drill starts with the risks on your actual site. Check for a clear emergency stop, guarded moving parts, and readable pressure warnings. These features matter when a crew works near traffic, buried utilities, or a narrow launch pit. Small details matter. A camera or well-placed control panel can reduce blind spots and awkward movement. Confirm that operators can reach controls without stepping across hoses or muddy ground. A safety checklist helps, but it cannot replace hands-on training or a careful utility review.

Reliability shows up between jobs, not just during a demonstration. Ask how often filters, seals, and hydraulic lines need attention, and whether routine service is easy to perform. Inspect the frame, connections, and wear parts for the ground conditions you expect. A machine that handles wet clay may struggle in abrasive gravel. Downtime gets expensive. Compare the purchase price with tooling, fuel, transport, scheduled maintenance, and likely repair delays. Also estimate crew hours lost when a drill sits idle or requires extra setup. A cheaper unit may still cost more over several seasons. I would give extra weight to service access and parts availability, though those estimates can be imperfect; actual soil and operator habits often change the numbers.

How to Choose the Right HDD Drill for Your Project? — Evaluate Safety Features, Reliability, and Total Cost of Ownership

Evaluation dimension What to assess Why it matters Practical selection guidance
Project scope and ground conditions Installation length, product-pipe size, required bend radius, soil or rock conditions, groundwater, and available work area. These factors affect drilling forces, tooling, drilling-fluid needs, and whether the planned bore is feasible. Match the machine and tooling to a site-specific bore plan. Confirm ground conditions and utility locations before choosing a rig.
Drilling and pullback capacity Rated thrust and pullback force, torque, spindle speed, and the rig’s ratings for the intended drill rod and tooling. Insufficient capacity can limit production or prevent completion; excessive capacity does not by itself make a rig suitable for every site. Compare the manufacturer’s rated values with the forces estimated for the planned bore. Allow for appropriate operating margin and follow the machine’s limits.
Safety systems Emergency-stop controls, operator-presence or interlock features where fitted, guarded moving parts, clear controls, and safe access for rod handling. HDD work involves rotating equipment, high-pressure drilling fluid, heavy rods, and potential contact with buried electrical utilities. Inspect and test safety devices before work. Use trained operators, required protective equipment, and a documented site safety plan.
Utility and electrical safety Utility locating and marking procedures, permits, exposure or potholing requirements, and controls for work near energized lines. Striking a buried utility can cause serious injury, service interruption, or property damage. Verify utility locations with the relevant authorities and site procedures before drilling. Do not rely on machine features as a substitute for utility clearance.
Drilling-fluid and returns management Fluid mixing and pumping capacity, pressure monitoring, fluid recovery, containment, and plans for inadvertent returns or surface heave. Drilling fluid supports the bore and carries cuttings, but uncontrolled returns can affect the surface, waterways, or nearby infrastructure. Size the fluid system to the bore and ground conditions. Monitor pressure and returns, and prepare a response plan appropriate to the site.
Reliability and serviceability Access to routine service points, availability of qualified technicians and parts, diagnostic support, and maintenance documentation. Downtime can delay crews, equipment, and restoration work, increasing project costs. Review service intervals and local support before purchase or rental. Check maintenance records and confirm that critical wear parts can be obtained in time.
Crew and transport requirements Machine footprint, transport weight, setup space, required support equipment, and the number of trained crew members needed. A rig that cannot access or be set up safely at the site may be unsuitable even if its drilling capacity is adequate. Check access routes, ground bearing conditions, lifting or unloading arrangements, and setup clearances during the site assessment.
Total cost of ownership Purchase or rental cost, financing, transport, fuel or energy, fluids, tooling and wear parts, labor, maintenance, downtime, and end-of-use value. The initial price is only one part of the cost of completing the work. Compare costs over the expected project or service period. Include support, consumables, utilization, and realistic downtime assumptions.
Purchase or rental decision Expected utilization, project duration, future work pipeline, operator availability, and access to maintenance support. Ownership can make sense with sustained utilization; rental can reduce capital commitment for short-term or occasional work. Compare a complete rental quote with ownership costs for the same scope, including delivery, consumables, service, and return conditions.

Note: Machine ratings, safety features, and maintenance requirements vary by model. Confirm current specifications and operating instructions with the equipment supplier, and evaluate each bore using site-specific engineering and safety procedures.

By continuing to use the site, you agree to the use of cookies. more information

The cookie settings on this website are set to "allow cookies" to give you the best browsing experience possible. If you continue to use this website without changing your cookie settings or you click "Accept" below then you are consenting to this.

Close