
Blog

What Are the Top Types of Manometer Connectors?

Choosing the right Manometer Connector can prevent leaks, unstable readings, and frustrating setup delays. A connector links the pressure source to the instrument, so its shape and sealing method matter. Common options include threaded fittings, compression connectors, hose barbs, and quick-connect couplings. Each suits different tubing, installation needs, and measurement conditions.

Threaded connectors are familiar in fixed installations, but matching thread standards is essential. A fitting that seems close may still leak. Compression connectors grip tubing with a ferrule, making them useful for neat, secure connections. Hose barbs fit flexible lines and are easy to install, though the hose must match the barb and operating conditions. Quick-connect couplings speed up repeated measurements. Convenient, but not universal.

This guide compares these connector types and explains where each may work best. It also considers port size, tubing material, pressure range, fluid compatibility, and sealing method. For example, a small handheld gauge connected to soft tubing may need a different fitting from a panel-mounted instrument with rigid lines. Even a careful choice can be undermined by a worn seal or mismatched thread. Check the manometer manufacturer’s specifications before installation, and inspect connections for leaks during setup. The best option is not always the most complex one. It is the connector that fits the instrument, the line, and the real working environment reliably.
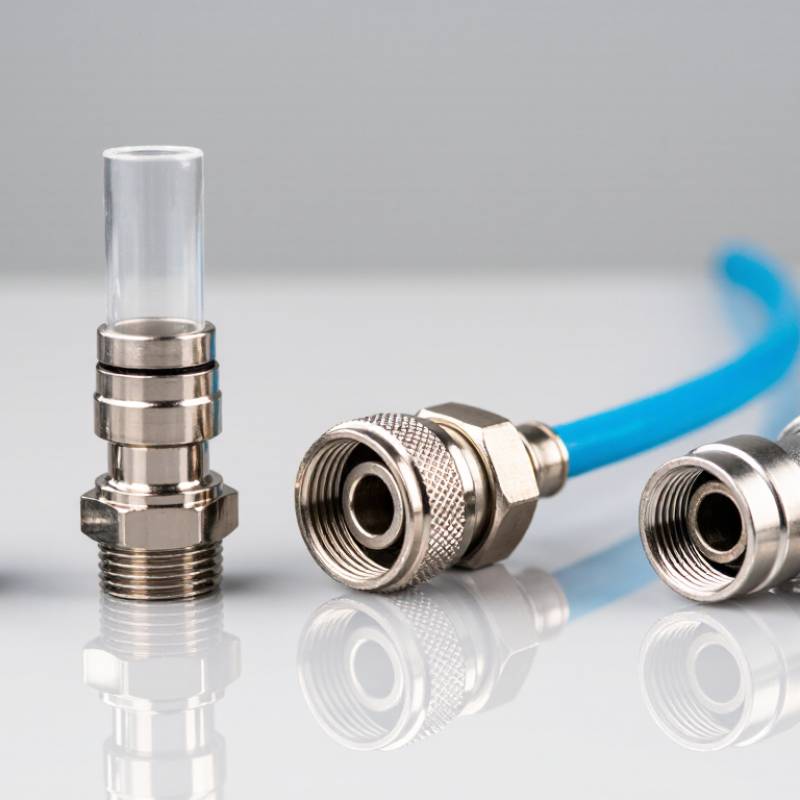
What Are the Top Types of Manometer Connectors?

How Manometer Connectors Link Instruments to Pressure Sources

A manometer connector forms the pressure path between a source and the instrument. NPT and BSPT threads seal through tapered thread engagement, while BSPP threads usually need a washer or bonded seal. Compression fittings grip small tubing with a ferrule; hose-barb fittings suit flexible lines at modest pressures. The right choice depends on pressure, fluid, tubing, and port geometry. A mismatch can leak or distort the reading. Fit matters.

Connection quality matters most when readings guide adjustments. NIST Technical Note 1297 explains that expanded uncertainty commonly uses a coverage factor of k = 2, corresponding to approximately 95% confidence under stated assumptions. That figure describes uncertainty reporting, not a connector’s performance. Still, it highlights why leaks, loose threads, and trapped air deserve attention. Keep the pressure line short, avoid sharp bends, and check that the fitting’s rated range covers the source. One detail is easy to overlook: a fitting may attach securely yet leave a narrow passage that slows response. Check compatibility against the instrument and source documentation, then verify the assembled system under controlled conditions. A snug fit is not proof of a sound measurement.

Threaded Connectors for Secure, Direct Pressure Connections

Threaded connectors create a direct mechanical link between a pressure line and a manometer. Common forms include straight threads, tapered pipe threads, and metric threads. Their appearance can be deceptively similar. Check thread diameter, pitch, and sealing method before installation; a near match can still leak or damage the port.

A good connection starts with clean, undamaged threads. Hand-start the fitting to avoid cross-threading, then tighten it according to the instrument maker’s guidance. Do not assume extra force means extra safety. Some fittings seal through the threads, while others rely on a washer or O-ring at the shoulder. Fit matters. Use the sealing method the connector was designed for, and confirm its pressure rating suits the system.

Small details matter. A thin film of process fluid around a joint may hide a slow leak, while overtightening can distort a soft port or crack a compact gauge body. After assembly, pressurize gradually and inspect the joint under operating conditions. If the reading drifts or bubbles appear during an appropriate leak check, isolate the line and reassess the fit. Threaded connectors are convenient, but they are not universal; choosing one by appearance alone is a mistake worth avoiding.

What Are the Top Types of Manometer Connectors? — Threaded Connectors for Secure, Direct Pressure Connections
Connector Type Thread Standard and Form Typical Sealing Method Common Use Fitment Consideration
NPT male connector National Pipe Taper (NPT); tapered thread commonly used in North America Thread sealant or suitable thread-sealing tape is commonly used on compatible connections Direct connection of pressure gauges and manometers to threaded ports, manifolds, or process fittings Confirm the NPT size and pressure-port thread. NPT is not interchangeable with BSP threads.
BSPT male connector British Standard Pipe Taper (BSPT), commonly designated R for external threads Thread sealant is commonly applied to compatible tapered-thread joints Threaded pressure connections in equipment designed for tapered BSP fittings Check the thread standard and size; BSPT and NPT may appear similar but have different thread geometry.
BSPP connector with sealing face British Standard Pipe Parallel (BSPP), commonly designated G Typically seals with a gasket, bonded seal, or O-ring at a designed shoulder or port face Pressure instruments and ports that use a parallel thread with a separate face seal The parallel thread generally provides mechanical engagement; verify the required sealing face and seal type.
Metric straight-thread connector Metric ISO thread, identified by nominal diameter and pitch, such as M10 × 1 Depends on the fitting design; may use an O-ring, washer, or designated sealing surface Metric equipment and pressure ports designed for a matching metric connection Match both diameter and pitch, and identify how the port is intended to seal.
Threaded connector with O-ring face seal Usually a straight thread paired with a defined sealing face and O-ring groove O-ring compressed between the connector face and the mating port Applications requiring a repeatable seal without relying on the threads for sealing Use the specified O-ring size and material, and ensure the mating port has the correct sealing surface.

Selection note: Verify the connector thread, mating-port geometry, seal material, fluid compatibility, and instrument pressure limits before installation. A thread type alone does not determine the pressure rating of an assembled connection.

Compression Fittings for Tubing-Based Manometer Setups

What Are the Top Types of Manometer Connectors?
Compression Fittings for Tubing-Based Manometer Setups

For tubing-based manometer setups, compression fittings create a sealed connection without soldering. As the nut tightens, a ferrule grips the tubing. Match the fitting to the tubing’s outside diameter, not its inside diameter. A small mismatch may look acceptable but cause a slow leak or let the tube shift. Small details matter.

Choose fitting materials that suit the tubing and the measured fluid. Cut the tube square, remove rough edges, and insert it fully before tightening. Follow the fitting’s specified tightening guidance; excessive force can deform tubing or damage the ferrule. A snug connection is not proof of a seal. Apply controlled pressure and watch for unexpected reading drift. Repeated assembly can also mark the tube, so inspect it before reuse.

Tips: Keep the tube aligned while tightening, and support it near the fitting to reduce strain. Check for leaks after assembly. If readings remain unstable, inspect the tube end and connection before assuming the manometer is faulty.

Flanged Connectors for Larger or Higher-Pressure Systems

Flanged connectors suit manometers installed on larger pipes, vessels, or systems with elevated operating pressures. Their broad mating surfaces and bolted joints help distribute mechanical loads more evenly than small threaded connections. The flange rating, material, and gasket must match the process conditions, including pressure, temperature, and fluid compatibility. A flange is not automatically safer just because it looks substantial.

During installation, check that the faces align and remain clean. A trapped particle or uneven gasket can create a leak path. Tighten bolts in a suitable cross-pattern, following the equipment procedure and specified torque where available. Small details matter. In field work, alignment can be awkward when nearby pipes restrict tool access, so plan clearance before mounting the manometer. It is easy to focus on pressure rating and overlook that practical issue.

Confirm the connector dimensions and pressure limits against the manometer documentation and the system design. Also consider vibration and pulsation, which may affect readings or joint service life. A flange may be excessive for a low-pressure, small-bore line; extra hardware does not improve every installation. When conditions are uncertain, have a qualified instrumentation professional review the connection and sealing arrangement before commissioning.

Hose-Barb and Quick-Connect Fittings for Flexible Connections

Hose-barb fittings suit flexible tubing when the barb diameter matches the tube’s inside diameter. Push the hose fully over the ridges, then secure it with a suitable clamp. Check the tubing material and pressure rating, too. A tight fit is not automatically a safe fit. Soft tubing can creep, especially with heat, vibration, or repeated movement. Inspect for cracks and swelling before relying on a reading.

Quick-connect fittings make instrument changes faster and reduce the chance of twisting a hose. Confirm that both halves share the same profile and pressure rating. Depressurize the line before disconnecting; trapped pressure can cause a sudden release.

The U.S. Department of Energy’s Improving Compressed Air System Performance sourcebook estimates that leaks can waste 20–30% of compressor output in poorly maintained systems. That figure describes whole systems, not manometer connectors alone, but it shows why small leaks deserve attention.

A simple leak check can help. Do not assume a connector is leak-free just because it clicks into place. Check seals, listen for escaping air, and compare the manometer reading against a trusted reference after installation.

By continuing to use the site, you agree to the use of cookies. more information

The cookie settings on this website are set to "allow cookies" to give you the best browsing experience possible. If you continue to use this website without changing your cookie settings or you click "Accept" below then you are consenting to this.

Close